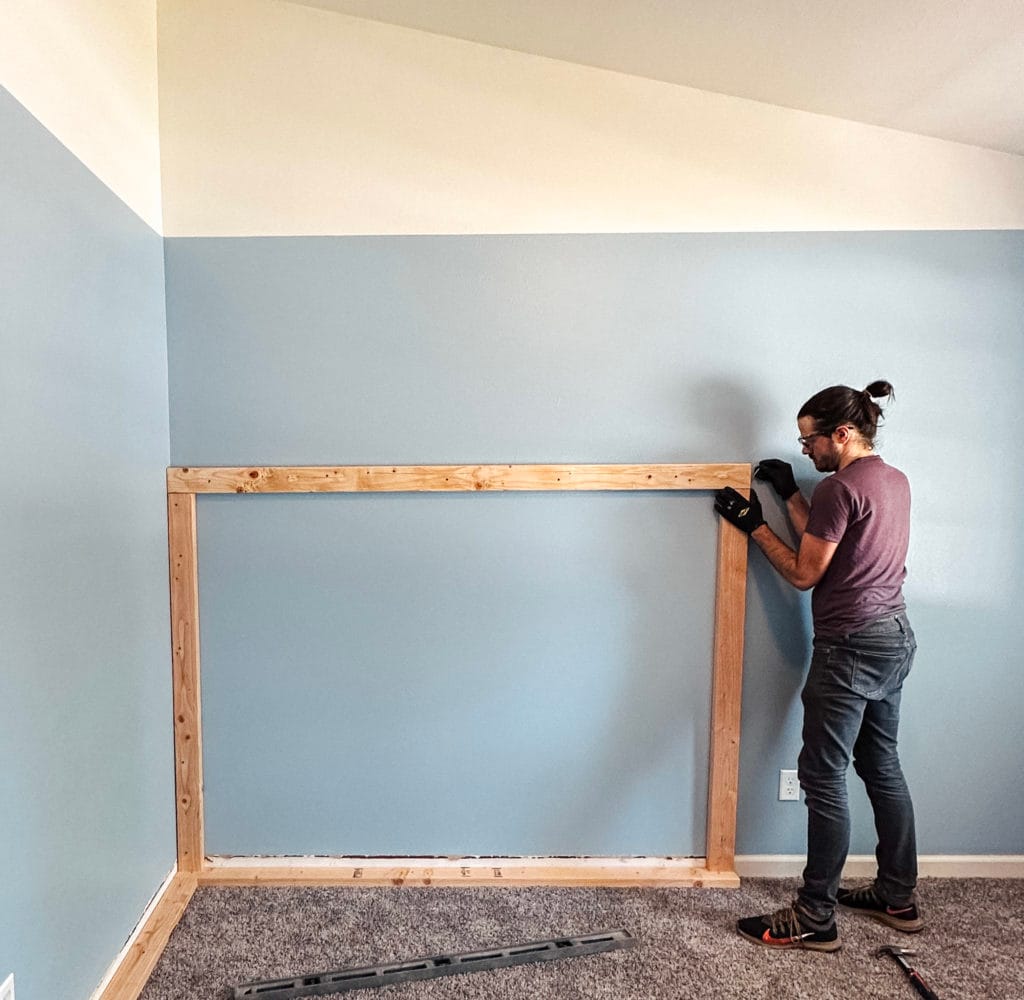

If you love tan khaki pants, you’re going to love our new house. It’s a 90’s tan dream boat. Ready to be adorned with a Puka shell necklace, a middle part, and highlights. As much as I love our 90’s digs, our girls’ weren’t feeling the vibe. The first big DIY we’ve planned is built-in bunk beds in their new, shared room. But the walls need a fresh coat of paint before we can start. I’ve been eyeing a color block paint idea and decided now’s the time to try it out!

A Trick Of The Eye
Color block paint is an easy way to add visual interest to any space at a very low cost. Plus, it’s an easy fix if you change your mind later.
Their room has a slanted, tall ceiling that will work well for the low-profile bunk bed design we have planned. But I still want to do all I can to help the room feel tall, open, and bright. A color block paint trick might just be it. Their ceiling needs repainted anyway so it’s the perfect time to test it. (I chose White Dove by Benjamin Moore for the ceiling and top part of the walls. This is my favorite creamy white.)

A Design Perspective
I’m trying to be a cool mom and let my girls in on their room design. We set up camp in the paint aisle of Home Depot and brought home so many paint samples I got a hand cramp when they inevitably asked me to hold them all. Together we settled on a bright blue–a far cry from our usual pinks! Who are we?!

This color is Peaceful Blue by Behr. It feels a coastal, definitely bright, and just the right amount of blue. I thought it would have more green undertones, but it’s coming across as very blue. I think we’ll make it work!
The color scheme I have in mind for this room is pinks, blues, and mustard yellows with lots of white accents. We went big with the blue color knowing their bedding will be a light pink, the bunk beds will be white, and their window curtains will be yellow. I made a mood board to keep all these design details straight.
Step 1: Painting The Lower Wall
I painted all the walls blue, up to about 5″ from the ceiling on the shortest wall. Next, I attached my laser level in a spot that was below all the blue paint. I made sure my line was level and then secured it to the wall using tacks.

Next, I placed long pieces of Sharp Lines painters tape just below the level line. I repeated this process around the entire room, making sure to stay at the same height. I pressed down on the tape to really adhere it since we have textured walls. This will help you get a crisp paint line!

A laser level is a great tool to have around. I find myself using it all the time. This Ryobi one is handy because you can tack it into the wall. You can get nicer laser levels that attach to a tripod, but this cheap one did the trick.


Step 2: Getting That Crispy Paint Line Of Your Dreams
Once all the tape was on, I was ready to start filling in the rest of the wall and ceiling with white paint.
Perfecting that crisp paint line between two colors is next to the kind of satisfaction only a perfect potato chip or a pickle crunch can bring.
To do this, I took a super soft paint brush with just a little bit of white paint on it. I brushed it along the top part of the paint to create a seal.
Like this:

The key is to use just a small amount of paint so that it
I did this on the top of each piece of tape. Next, I went around the room and painted the ceiling and final part of the walls white. As soon as I finished painting around the room, I pulled the painter’s tape off to let it all dry.
I ended up with a super crisp line between the two colors!

The ceiling feels so open in here now! The blue color visually anchors the lower half of the room, making it still feel balanced. This will be important when we add furniture and decor back in.
Color block paint is a great way to add visual interest to a space at a very low cost. Plus, it’s so easy to fix if you change your mind later. Fresh paint breathed new life into this room.
It’s on it’s way to feeling more like us. Now we’re ready for bunk bed project! Let’s goooooo!