It’s no secret that we love books in our house. Our house is small and storage space is limited. We don’t have room for bookshelves, so I decided to DIY three extra-large ledge bookshelves for my kid’s room.
I’ve never built floating ledge bookshelves like this before, but y’all! It was so easy! Anyone could do this. This project is approachable and beginner-friendly.
It was much cheaper than purchasing pre-made shelves too. Here’s a step-by-step tutorial on how I did it, start to finish!

Tools & Materials Needed
MATERIALS
- Select Pine Boards (per shelf)
- 1×3 (2)
- 1×2 (1)
- 120 + 220 Grit Sandpaper
- 2 1/2″ wood screws to attach shelves to wall
- 2″ wood screws or Brad/Finish nails
- Optional: Drywall Anchors
- Wood Filler
- Wood Glue
- Paint Primer
- Paint – Urethane Alkyd Enamel
TOOLS
- Mitre Saw or Table Saw
- Sander
- Nail Gun or Power Drill
- Tack Cloth
- Soft bristle Paint Brush
- Wood Clamps
- Stud Finder
- Level
How To DIY Ledge Bookshelves
I’ll cover each step in detail below. These are the basic steps you’ll follow to complete this project.
Project Steps Overview
- Measure and cut the boards.
- Fill in Imperfections and sand.
- Nail and glue boards together with a nail gun or power drill.
- Prime boards if needed.
- Paint bookshelves with 1-2 coats of paint.
- Locate studs in the wall.
- Insert anchors into the wall If needed.
- Pre-drill holes through back of shelves.
- Attach shelves to Wall using screws.
I finished this project within a few days from start to finish. It took longer because the paint needed to dry between coats and before attaching the shelves to the wall.
If you’re looking to build floating ledge bookshelves for your kid’s room, here’s the detailed step-by-step instructions to complete your project.
DIY TIP: No Table Saw?
Assemble the Shelves
Step 1. Measure and Cut the Boards
Decide where you want to hang your shelves, and how long you want them. Measure and cut each board to the same length using a mitre or table saw.
Step 2. Fill in Imperfections and Sand
Smooth wood filler over any knots, scratches, or indents in each board, including the ends. Let it dry according to the instructions, usually less than an hour. Don’t forget to fill in the grain on the ends too.
Once the wood filler is dry, use a 120 grit sandpaper to gently sand each board along the grain (not against). Next, use a 220 grit sandpaper to gently sand again. This should make the wood feel smooth like butter. Run your hand over each board to make sure it’s as smooth as possible.

Step 3. Nail and Glue Boards Together
Assemble your boards together like this (pictured below). Run a line of wood glue along each side of the middle board. Use wood clamps to secure it together until it dries, or until you can nail/screw it.

Use a nail gun or drill to secure the boards together. I did this while my boards were clamped together and the glue was still wet. I let my shelves sit for a little bit and then nailed it together while the glue was firm but not yet dried.
Two Methods For Assembling


You will get a better finish using brad or finish nails, but either option will work!
Paint the Ledge Bookshelves
Step 4. Prime Boards If Needed
Clean the dust off each board with tack cloth. I used a vacuum with a bristle brush attachment too for added measure. Make sure there are no lingering dust particles on the wood before painting.
If you’re boards are pre-primed, you can skip straight to painting! If your wood is bare, use a soft paint brush to lightly prime each board one side at a time. Once one side is totally dry, flip it over and paint the other side. Use a quality primer like Zinsser 1-2-3. Once it’s dry, usually about an hour or so, sand the boards smooth again with the 220 Grit sandpaper.
If you’re planning to stain your boards, skip the priming step. Consider using a wood conditioner to help the stain absorb well.
Step 5. Paint or Stain Bookshelves
Remove all lingering dust with a tack cloth or vacuum. Using a soft brush, paint each board with a high-quality, flow-leveling paint. I use Behr’s Urethane Alkyd Semi-Gloss Enamel Interior/Exterior Paint anytime I’m painting wood, trim or doors. Work in small sections and get full coverage the first time you apply the paint.
Avoid back brushing as much as possible. If you try to touch up the paint while it’s still wet, it absolutely will leave brush marks. The paint will look streaky as it dries and you may panic and want to fix it while it’s wet. DON’T! I promise it will even out and look amazing when it’s dry. Messing with it while it’s drying will guarantee a ruined finish.
If staining, use a rag or sponge to wipe the stain onto each bare board. Then wipe off any excess stain right away and let dry.

Attach Ledge Bookshelves Shelves to Wall
Step 6. Locate Studs in the Wall
After the paint is dried, you’re ready to attach them to the wall. There are two ways you can do this. 1. You can screw into wall studs, or 2. you can use drywall anchors.
If possible, I recommend attaching them to at least two studs on the wall. Books are heavy and this will keep your shelves extra sturdy. But if it’s going to place your shelves in an odd spot on the wall, or for some reason it’s just not possible, you can use drywall anchors instead. Drywall anchors can hold over 50lbs each, so this is a great option.

Use a stud finder and mark the location of the studs with a pencil.
Step 7. Pre-drill Holes Through Back of Shelves
Drill holes with your power drill in the center of the back board that align with the studs you’ve marked, or where you will insert wall anchors.
Step 8. Insert Anchors into the Wall If Needed
The easiest way to ensure you place wall anchors in the right spot is to use the pre-drilled holes in your shelves! Take a long pencil, insert it through the hole in the shelf, and mark on the wall. This is where your anchor will go. Use a power drill or screwdriver to insert the wall anchor so it’s flush with the wall.

Step 9. Attach Shelves To Wall Using Screws
Next, insert the 2 1/2″ wood screws into the pre-drilled holes of the shelves. Using one hand to hold the shelves, use your power drill to insert the screws into the studs or anchors in the wall.

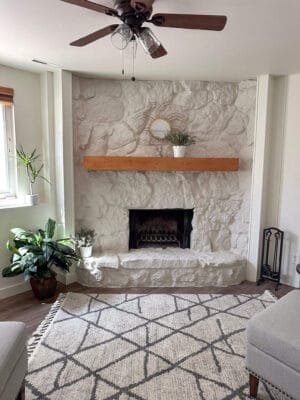
YOU’RE DONE! Add your books, and enjoy your new shelves!!
You can fill the last screw holes with wood filler and paint over them, or you can just the holes! I chose to leave them because the books cover them up anyway.
These shelves are 4-feet wide and cost $85 dollars to make. Pretty doable right?! You can see my video tutorial over on my Instagram under the “DIY Shelves” highlight.
Read Next >>>