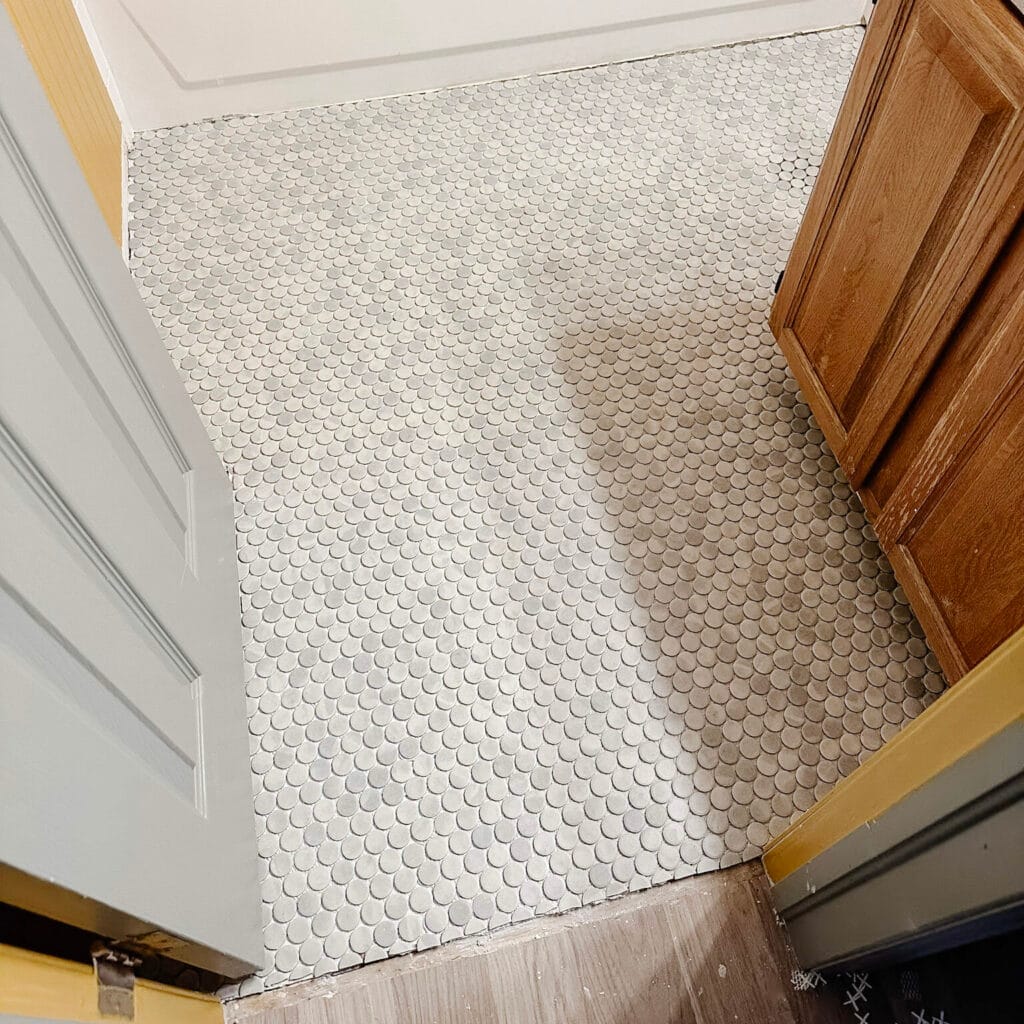
Today I’m sharing how to tile a bathroom floor in your home. Learning how to install tile is such a helpful skill to learn as a homeowner. It can save you thousands of dollars in your remodels! After tiling three bathrooms (Pink Bathroom, Green Bathroom, and our Mermaid Bathroom below), I’m giving all my tips and how to’s here for you.

Read Part 1 of this post for more info on how to prep your wooden subfloor.
Step-By-Step: How To Tile A Bathroom Floor
Once your subfloor is clean, level, and flat, the subfloor has been adequately supported for your tile, and you’re tile underlayment has been installed, you’re ready to start tiling!
Tools & Materials Needed:
- Laser Level
- Tile Saw
- Diamond Saw Blade
- Score & Snap Tile Cutter (Ceramic tiles)
- Handheld Tile Cutter (Ceramic tiles)
- Tile File
- Tile Spacers and/or Tile Leveling Spacers – size varies
- Tile Gloves
- Notched Trowel – size varies
- Grout Float
- Paddle Mixer Drill Attachment – for mixing thinset
- Sponges – for cleanup
- Buckets – for mixing thinset
Design Decisions To Make Before You Start Tiling
Before we jump straight into the step-by-step process of how to tile a bathroom floor, let’s briefly cover the design decisions you need to make now for a successful tile job.
Purchase Your Tiles + 10% Extra
Once you’ve selected the tile you want for your new bathroom floor, calculate your square footage and purchase the number of tiles you need plus an extra 10%.
The reason you want to have extra on hand is because…
- Some tiles may arrive damaged.
- You may make mistakes during the install.
- If your tiles have a pattern or have any color variety, this gives you options to pick and choose from to get the look you want.
- Don’t count on your tile being in stock forever. If a tile gets broken in a few years from something dropping on it, you’ll have extras on hand to be able to replace it!
Additionally, purchase boxes of tile made from the same lot. This means they were made and dyed at the same time, so they should all match exactly. The side of the box should have a printed lot number on it.
Select Your Grout Color
Select your grout color and type that looks best with your tile and project. (I love Mapei FlexColor CQ.) Stores like Home Depot, Lowe’s, or Floor & Decor have stick samples that you can hold your tile next to for help choosing a color. You can also purchase a grout sample set.

For large projects, I’d recommend buying a small bag of grout and test a few colors. Grout can heavily influence the final look of the tile. It’s a big decision to make! Emily Henderson shared a great example of this in their primary bathroom tile project. Can you believe those are all the same tiles?!
Choose A Grout Line Size
Once you finalize your grout color, it’s time to determine your grout line size. This is the space between each of your tiles.
The larger the tile, the larger the grout spacing you’ll need for the final look to feel balanced. Small mosaic or penny tiles will have a smaller grout line size (like 1/16″). You can ask your local tile store or look on the tile website you purchased from for a recommendation for your specific tile.
Choose A Tile Layout
Next, determine the pattern of your tiles. There are so many options for this! I’d recommend browsing through Pinterest for some ideas. A Beautiful Mess has a great diagram for subway tile patterns.
Lay out a few rows of tile to see if it will work in your space and if you like the look.
Step-by-Step Tiling Process
If might surprise you, but tiling a bathroom floor can require lots of math. Grab your friend who’s good at math for support or a calculator and pencil.
Step 1. Determine your starting point.
Many tile professionals will start in the center of the room. This ensures that the tiles will be even around all the edges of the room, giving a really clean look in the end.
For small mosaic tiles, I’ve started along the bathtub or the side of the room instead of the center to ensure a clean line where it will be highly noticeable.

But for larger format tiles, starting in the center of the room might work best. Use a tape measure, laser level, or carpenter square to find the center of the room. Mark onto the backer board with a pencil the very center of the room. Dry fit one of the tiles over this mark and trace around the edges. This is where you’ll place your first tile!
Step 2. Place Your First Tile.
Mix your thinset and add to the subfloor with a notched trowel in small sections.
Place your first tile at your determined starting point and move to one side of the room from there. Completing one row at a time.
I highly recommend setting up a laser level to keep your lines straight as you go.
A few tips I’ve learned over the years to keep in mind as you proceed…
Tip #1: Don’t skip ahead.
Always tile one row at a time to ensure your grout lines and spacing will be correct.
Tip #2: Don’t tile yourself into a corner.
Move towards a doorway to ensure you won’t mess up your tile work by having to step on it to get out of the room. If needed, tile over multiple days in sections.
Tip #3: Apply thinset in small sections on the subfloor.
Once the thinset has been applied to the floor, it will start the drying process. If it’s left in the open air too long it can develop a skin and prevent the tiles from adhering correctly.
Additionally, consider mixing your thinset in small batches. Check the “open pot” time of your thinset to determine how long it will be workable once it’s mixed.
Step 3. Set The Tile.
Once the tile has been placed into the thinset, gently wiggle the tile back and forth into the thinset to ensure good bonding and release any trapped air.
Working quickly, add a tile spacer along the edges of the tile, in the corners, and wherever you need extra help lining them up.
Adjust the tiles while in the thinset until they are straight and even. Check with your laser level or carpenter square as needed. If your tiles are on mesh sheets and aren’t lining up correctly, you can pop out tiles from the mesh backer and place them in the right position.

Once the tiles are in the right spot, use a grout float to press the tiles into the floor. For larger tiles, use a leveling spacer to level each tile with the ones next to it.
Larger tiles can be “back-buttered” as well. This means using the notched trowel to add thinset to the back of the tile before placing the tile into the additional thinset on the subfloor. Back-butter your tiles in the opposite direction of the thinset on the floor.
Once the tiles are even and straight, add the next tile, and keep moving in a line.
Step 4. Remove Excess Thinset.
Using a small toothpick or screwdriver, remove the thinset that comes up too far between the tiles. The space between tiles will be filled with grout, and you don’t want your thinset to show through!
If you find you have a lot of excess thinset between tiles, you may need to use a smaller notched trowel or back-butter your tiles with less thinset.
Thinset Color Tip
See the bright white dot below in the middle of this picture? That’s excess thinset that I missed! If I had used gray thinset instead, it would be hidden.

Step 5. Cut your tiles around plumbing fixtures, edges, and corners.
Using a wet tile saw, a score-and-snap tile cutter, or a hand-held score-and-snap tile cutter, measure and cut your tiles to fit around the plumbing fixtures and walls in the room.
Step 6. Redoing Tiles As Needed.
If you make a mistake and need to pull off a section of tile, scrape off the thinset from the floor and the tile and replace it with fresh thinset. I know it’s a bummer to start over, but you’ll thank yourself later for paying attention to the details now! Try to get it right the first time so you never have to do it again.
Step 7. Let The Thinset Dry.
Once the floor is tiled, let it dry according to your thinset instructions. It typically needs 24 hours before you can walk on it and grout it.
And CELEBRATE that you just tiled a floor! Way to go!!
How To Tile A Bathroom Floor: Next Steps
Once the tile is done drying, the final step is grouting the floor! And then placing everything back onto the tile (toilet, vanity, waterline trim, etc.). The hard part is done!
Now that you know how to tile a bathroom floor, you’ll be unstoppable with your future home projects. This is an amazing skill to know as a homeowner that will save you so much money. Money you can put right back into your home’s design.
Cheering on all your DIY projects! What questions do you have about this process??


